When you first get your kayak, you’re excited to get it out on the water and see just how great a toy you’ve aquired. The concept of how you’re going to anchor that kayak rarely enters those initial thoughts. When the new purchase excitment settles you’re going to have to choose an anchoring system. But how do you make that decision?
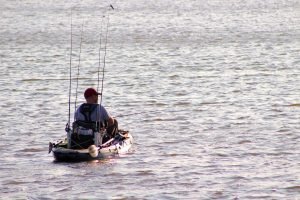
First, you have to consider exactly what you’re going to be anchoring. Then you have to take into account where you’re going to be anchoring that kayak. After that, the hard decisions start. You have to decide what type of kayak you’re going to be using. Then there’s the decisions on how that anchor is going to be attached to your kayak. And, ultimately, you’ll have to be prepared for the safety risks anchoring can cause.
What are you going to anchor
Kayaks are so diverse these days that the first, most significant question you must answer is what kayak are you anchoring. A streamlined sit-inside kayak like the Bonafide EX123 is going to paddle easily and track smoothly. You won’t need as intensive of an anchoring system as you would need with a Perception Outlaw 11.5 that sits more bulky in the water catching current and wind pressures with ease.


Stats, reviews, and personal experience will give you a good handle on what your kayak will do. From there you can expand your plans and expectations.
Where are you going to anchor
A pond with no current will frequently require little to no anchoring. The wind may require you to use ann anchoring system from time to time, but it won’t be forefront in your mind.

Deep lakes are going to require some anchoring, but lead length is going to be more of a challenge to you than weight. Unless there is heavy current, your only big challenge to positioning will be the wind.

Rivers and creeks are the truest challenge to a kayak’s anchoring system. The ebb and flow of the current combined with slack and riptides can pose multiple challenges to a kayaker trying to create a stationary position. Cross winds, funnels through gullies, and unexpected weather changes can effect your kayak drastically.
Your challenges will be above the waterline just as much as below it.
This is why knowing your fishery is so important. Cross winds frequently arise in the same general areas. Undercurrents are going to fluctuate in intensity, but will always be at the same points in the waterway. Adequate anchoring will require understanding what challenges your specific fishery will present.
What are you going to anchor with
Now this is where the fun begins. Spot lock is the rising rage throughout the fishing community. But is it’s cost worth the investment to you?
Pole anchors are growing in popularity also.
The catch with these, however, is the water level restriction. They are only good for shallow waters. Anything more than 10 feet and your pole anchor is almost guaranteed to be useless. Some systems won’t even handle that much depth. Some are powered with a Hydraulic system that can drive the pole into the ground with the click of a button. They are easy on the user but will require a bit of upkeep, care, and expense to purchase as well as maintain.
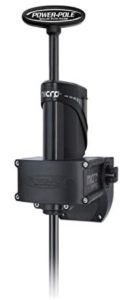
The manual pole systems, on the other hand, will not require as much cost or maintenance.
The hand off, however, is the requirement of the user to physically take the pole and push it into the ground under the kayak. Either option can help secure your kayak in position. You are more restricted by your budget than useability…as long as you are anchoring in shallow waterways.
A drift sock or drag chain may be sufficient for your needs.
If you are fishing a bank or floating through a river, you may not need a fully stationary anchoring system. Drift socks or drag chains will slow your motion through the water allowing for extended fishing time without requiring the cumbersome hassle of dropping and raising an anchor repeatedly.
Bulk weights are probably the most frequent DIY anchors used by kayakers.
Traditionally, the most common anchor will be a solid weight dropped from the kayak attached to a line. Strictly speaking, there is no rule as to what has to be used for that weight. You can use a rock, a block of concrete, a dumbbell, or any number of other heavy objects.

The factors you have to focus on with this anchoring system are its practicality and its effect on the waterway. You’re not going to want to use anything that will pollute the environment for a whole list of reasons.
Different anchor structures work better for different substrates.
Weight is rather relative considering the difference in gravity and buoyancy under the water surface as opposed to on land. Subconsciously, we’re accustomed to gravity demands as they apply to cars, bicycles, and (for those of us that hunt) ropeman ascenders that keep us from falling out of trees.
When it comes to anchors on the water, we grow up watching videos of cargo and battle ships dropping massive claw shaped blocks of steel into the water with a resounding splash that we can feel vibrate in our chest even through the tv. If we were lucky enough to grow up on the water, it was most likely a boat (pontoon, bass boat, Jon boat, etc.). Still, the anchoring demands are more significant. You’re putting a larger, heavier, bulkier object into a stationary standstill irrespective of current and wind.
Kayaks, with their minimal weight, low profile, and limited surface area don’t require as steadfast anchoring. Under most circumstances, you’re not going to need more than 3 pounds of weight on your anchor. This is why dumbbells are such a popular choice. Similar to the dumbbell, but true to the anchor designation, is the mushroom anchor. Alternatively, you could choose a grapnel, a claw, or a brush gripper style anchoring system.

GRAPNEL ANCHOR
Probably the most common kayak anchor on the market, the grapnel anchor is a weighted claw with 2 or more fingers that grasp the bottom of the waterway to hold you in place. They are best suited for sandy type floorbeds. The biggest precautions are their propensity to get stuck in rocks, tree branches, and other unforgiving debris under the water’s surface.

MUSHROOM ANCHOR
A common second choice for kayakers, the mushroom anchor works great on rocky surfaces, but will be cumbersome to use in areas with heavy sand or silt. The crevice around the anchor gets filled with the sand or silt and can become difficult to pull up when ready to leave.

CLAW ANCHOR
Commonly used in ocean kayaking, the claw can provide a secure base for anchoring in strong currents. They are, however, cumbersome to use on a kayak (especially for newer kayakers) due to their sharp points, heavier weight, and awkward motions.

STAKE-OUT POLE
Discussed earlier, these can be manual or mechanical, but will only work in shallower waterways. Another precaution to remember is that they only work if used in soft surface environments. Sand, mud, and silt will allow the pole to penetrate deep enough for securing your vessel. Rocks, pebbles, and other hard surfaces will block the penetration needed to ensure your pole keeps you stationary.
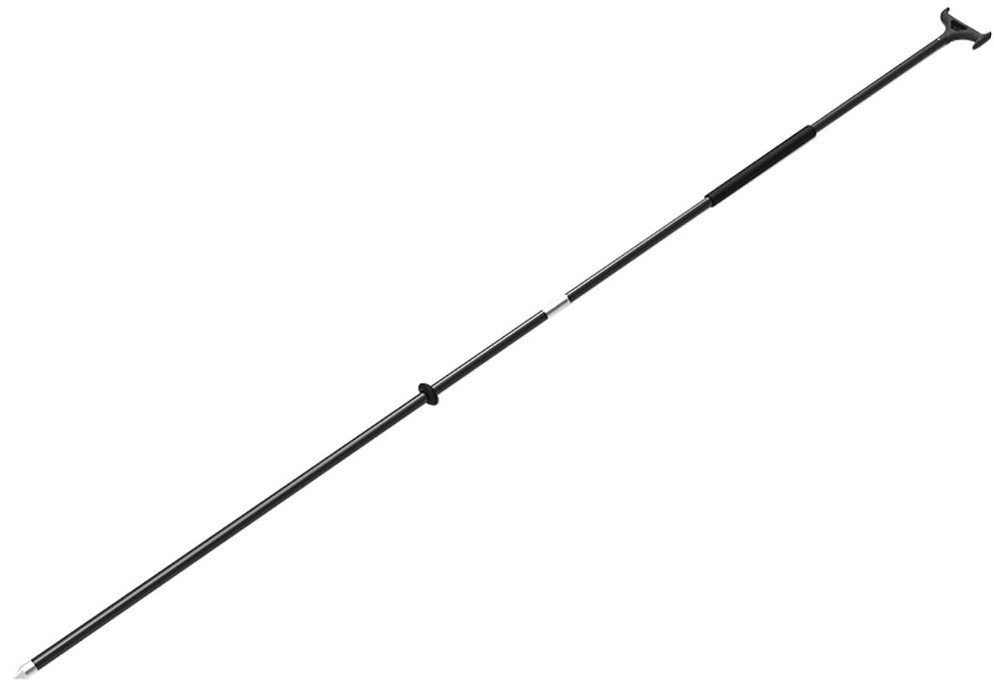
DRIFT SOCK
As mentioned above, these are great for slowing your motion if already in slow current. They can help when fishing in light winds also. They do not, however, keep you stationary if not wishing to move.

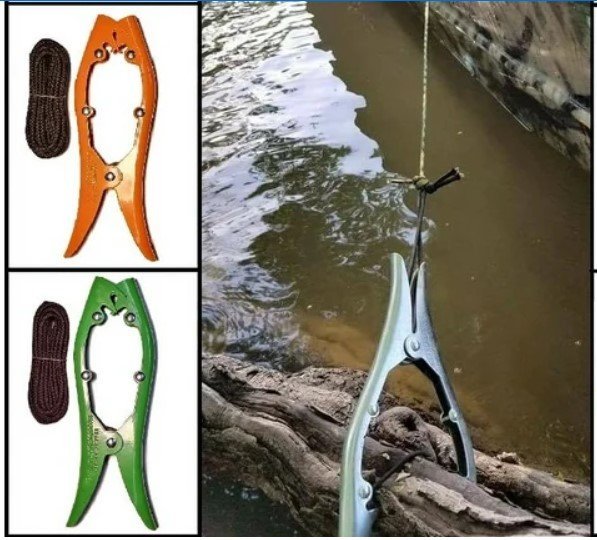
BRUSH GRIPPER
One of AJ and my favorite means of anchoring, the brush grippers are lightweight, very compact, and easy to move around your kayak for a variety of positioning. They are tied to your kayak then attached to some stationary object protruding from the waterway. The precautions are a bit diverse though. Ants, spiders, and snakes will have direct access to your kayak from the structure you attach to. There must be structure around that you are not intending to fish.
DOWNRIGGER WEIGHT
Much like a mushroom or dumbbell weight, the downrigger weight is a smooth surface weight that allows for anchoring in virtually any water environment. While the standard safety precautions remain the same as you’ll have with any kayak anchor, you’re not going to be challenged by as many “snag” points as most of the common, traditional anchors. The smooth surface allows the anchor to hold you in place and be retrieved without easily snagging on debris, the fin helps the anchor drop relatively straight down (the exception being strong currents can catch the fin). And you’ll have a variety of size options as well.

DRAG CHAIN
Not exactly an anchor (unless it gets caught in weeds or tree branches from a fallen tree) the drag chain is a good option for slowing your momentum in a current. The weight can be altered with different lengths of chain. Snagging can be minimized by wrapping the chain. The wrapping can, also, help reduce the sound that may disturb surrounding fish.

There are other options available:
Sand Anchors, Dumbbells, Cinder Blocks, etc. But the ones listed here are the most common, universal anchors in use today. Once you’ve chosen the type of anchor you’re going to use you can decide how you’re going to anchor your kayak.
How are you going to anchor your kayak
The biggest factors in this decision center around the precaution and safety needs of the kayaker. In this case, you.
If you have mobility or strength issues, you may need to consider some degree of mechanical assistance to deploy and retrieve your kayak. The Anchor Wizard is probably the most widely recognized option on today’s market. Various companies also produce anchor reels (originally designed for divers) that can be attached to kayaks near your seat to allow for easy winding and unwinding of the line. YakGadget has come out with the Quickwinder as a simplified answer to the anchor wizard.
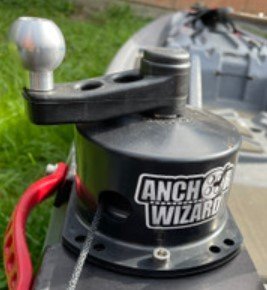
Many DIYers opt for retractable dog leashes or cord management systems such as the YakAttack Sidewinder. These are more sufficient for line management to keep your cockpit clean than they are for reducing the retrieval and deployment efforts, but nonetheless they help keep your anchoring system user friendly.
From a safety standpoint, you must always be observant of your anchoring system, how you’re using it, and what it is doing to your vessel.
Strong currents can start pulling on your anchor line causing a dip in the edge of your kayak. If it dips too far, you can start taking on water without realizing it. A wave from a speeding boat passing by or a sudden upsurge in the waves inshore can flood your kayak if enough line hasn’t been let out to allow your kayak to flow with the varying surface levels. If you keep your anchor hanging off the side of your kayak, you will need to ensure you don’t catch your anchor on brush or tree limbs as you pass by.
As anglers, another key factor we have to consider when anchoring is what we will do if we need to get away from our anchored position quickly. Power poles and other automated anchoring systems can allow you to simply push a button and the line will be retrieved for you. Most of us kayak fishermen, however, prefer to put the larger portion of our budget to catching the fish rather than positioning our kayak.

Because of that, we have to be ready at a moment’s notice to move.
There may be a speedboat heading right for us with no intention of watching for anyone else in the water. You might be fighting a PB bass, a ferocious alligator gar, or the toughest little striper you’ve ever encountered and need to move to prevent your line from snapping. Under most of these circumstances, the best means of quick escape is to disconnect the anchor from your kayak with the intention of returning later to retrieve it.
How do you find your anchor after dumping it overboard like that?
The easiest, cheapest, and most accommodating method AJ and I have found has been to attach a float to the end of our anchor line. We tend to ensure we’re using a bright color that will stand out in the stained waters we typically fish in. The float attaches near the end of the anchor rope so that there is plenty of line for us to work with while anchoring. It also ensures the float will remain above water as it floats around waiting for your return. Once your distraction is complete, you can return to the site where your anchor was abandoned, locate your float, and pull your line back in. These floats are easily found on sale for a dollar or two.
Whether you use a quick release clip and float or not, always ensure you have a sharp knife handy in case your line gets tangled, you get caught in your line, or some other risk develops where you have to cut the line and abandon your anchor all together. A couple years ago, AJ and I were fishing a creek with a significant expanse of fallen timber about 12 feet below us. We were both using grappling anchors that were getting wedged between the branches every time we anchored.
As the current was rising and we were preparing to head home for the day, AJ went to pull her anchor in.
She discovered the anchor had gotten wedged under some branches and she was actually getting close to running out of line. The more she pulled and attempted to maneuver the anchor to free it, the lower her gunwall was moving to the surface of the water. Instead of a quick release clip (since we were only going for an easy, quick trip–famous last words) she had tied the line to her side handle. Eventually she had no option other than to cut the line and we stopped at the sports store on the way home to pick up a new anchor.

Your choice of anchor style will affect how you anchor your kayak.
Some of your choices will be relatively obvious. You can’t deploy a drift chain out the front of your kayak unless you plan to fish backwards. A brush guard can be attached to the front or rear of your kayak, but you’re going to have to get up and move to that section of your vessel to attach it. Other anchor options are a bit more strategic, though.
Say you’re one of those anglers that likes to sit in the middle of the canal and slowly fish every structure surrounding you. An anchor at the back of your kayak will allow your vessel to slowly rotate around the anchor as you fish.
Maybe you’re the type that sits 15 feet out and casts to that one spot several times before moving on the the next location. In this case, you may want to drop anchor at the bow of your kayak and use your paddle or motor to shift back and forth if you begin to pivot.
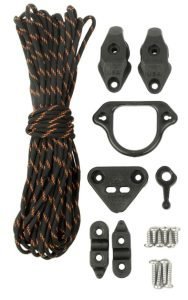
If you’re like me, you’re changing up your anchoring style in almost every situation. One minute, you’re anchoring up front to keep facing your target. The next you’re anchoring off the side so you can lean to the side and jig for fresh bait. Most of my kayaks are now set up to accommodate my varied style of anchoring with an anchor trolley on each side of the kayak. I run the line through a ring on the trolley and can move the line to whatever position I need for that situation. Even while anchoring I will tend to move my line to reposition for just that right casting angle.
What are you going to do in an emergency
I hinted at this earlier, but truly can’t emphasize this enough. Your safety needs to always be of utmost importance. Ever since AJ’s incident where she had to cut the anchor line, I’ve tried to use quick release clips on every anchor I use. This makes freeing the kayak quick and easy under virtually all situations. I always have a dive knife on me in the event I can’t get to that quick release clip. My third means of safety is to always ensure my anchor line is at least 3 times longer than the deepest area I may anchor in. If the tide rises, waves begin rocking my kayak, or the line starts pulling on my kayak, I know I have enough line to release tension.

