Modifying your kayak can be nerve-racking. You’re investing your hard-earned money into a piece of plastic. Then you’re going to place your life in the hands of that piece of plastic. Are you sure you want to put holes in it? When AJ and I got to the point that we knew we wanted to modify our kayaks we had to accept the need for drilling holes, buying supplies, and investing our time. The cost (monetary and otherwise) can become intimidating. A lot of that trepidation can be mitigated by applying 3 techniques that make the mods process more manageable.
Repurpose material you have laying around
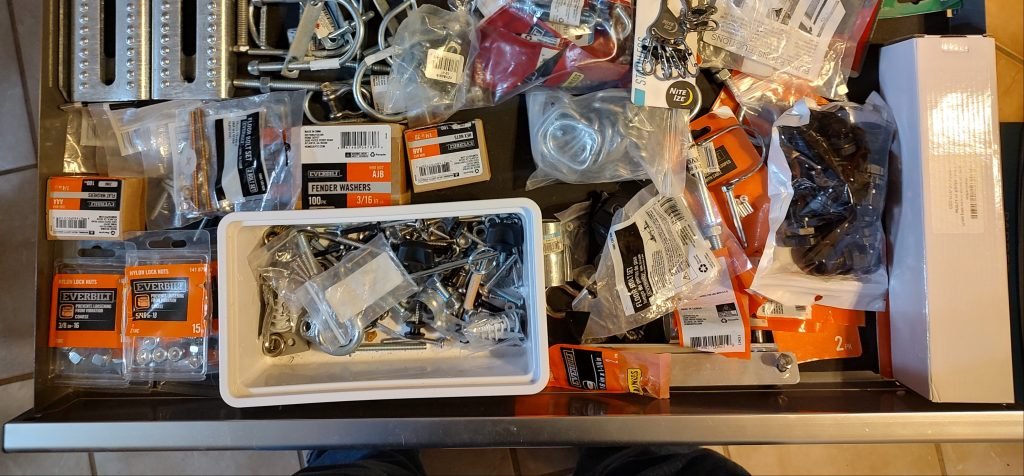
Every household, seems to have the inevitable junk drawer. Hinges, pulleys, door knobs, screws, nails, and so much more…We’ve talked before about the importance of using marine grade products and the value is stainless steel screws. But what do you do when you’re on a budget and just trying to make some upgrades? This is where those random “I may need this someday” things become priceless artifacts!
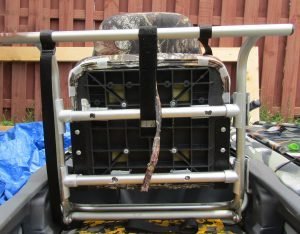
AJ and I do a lot of things ourselves rather than hiring out. A sprinkler line broke and I went to the hardware store, bought the supplies I needed, and replaced everything myself. It was cheaper back then to buy an entire PVC pipe rather than the precut pipe close to my needed length. I didn’t get rid of the leftovers in case I needed to do the same project again. As luck would have it, that PVC pipe was the perfect size to make a seat attachment for my first Big Fish 120 project.
When the YakGadget Crate came out, we were frustrated with the cumbersome setups of milk crates and got a couple to use for our kayaks instead of those clunky milk crates. It didn’t take long for us to discover they were just as cumbersome but for different reasons. They were heavy, bulky, and didn’t fit in most of the kayaks we intended them for. Before long they ended up on the top shelf of a storage cabinet and stayed there for a couple years. Eventually a new modification project was underway where we needed something flat, strong, and lightweight. Starboard wasn’t going to be a solution due to cost until we realized those crates were made of starboard. By repurposing the material and building the transom mount out of the starboard crate, we solved two problems at once! The unused case is no longer taking up space and the transom mount we produced is working great.
See where we’re going with this?
Let your ingenuity take control and the solution just might be at hand already.
Modify the parts already on the kayak
Most of us don’t really like the strap style handles that usually come on cheaper kayaks. A common mod kayakers opt for early on in their adventures is to change out the handles to the aftermarket rigid handles. What do you do with the old handles? Don’t throw them away. Make yourself a small storage box to keep in the back corner of your closet or under your toolbox.
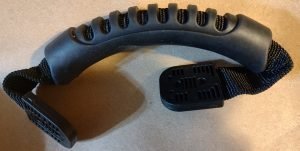
You remember that storage crate you built? Remember how you have to stick your fingers through the grates to carry it around? Now you’ve got handles that stay out of the way but are gentler on your hands as you carry it.
Or build yourself a kayak friendly livewell. You can use those handles for carrying that livewell back and forth to the dock.
Start small and expand as the experiment develops
We’re kayak anglers. It’s simply in our nature to be as big and over the top as we can be with our kayaks. But when you’re building on a budget, you’re going to have that little voice over your shoulder (spouse, parent, bank account, what have you) telling you that you need to cut back. That can give you an incredible skill for kayak mods…adaptability.
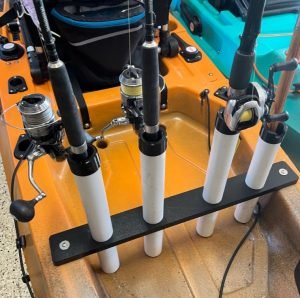
Say you want to build something for more rod storage. Start with a 3 or 4 rod holder instead of 10. See what works for you, what you want to be different, and then expand to more rods when the budget allows.
How about those milk crates we’ve been talking about? When you’re just starting out, they are a true game changer. For many kayakers they are the solution that lasts a lifetime. But don’t think you have to build the ultimate box right off the bat. Start with a simple, basic design. As the budget allows, add more to it. In time, you’ll have a box that holds everything the way you want it to, is convenient and easy to access, and you’ll have fewer “oops” holes where you added components you didn’t actually need or want.
Of course you could always use this as an opportunity to practice your plastic welding!
The bonus tip you may have seen coming…
There’s kind of a theme to the suggestions and processes AJ and I are always talking about. Experiment. Just like when we told you to test out your kayak before you make changes, test out your mods. See what you like. Decide what still needs to be tweaked. Then make alterations as you go.

