Okay, we’re going to start with what you have to know and then go on to what you want to know. Every modification you make to your fishing kayak will affect how you kayak, how you fish, and how the game wardens will interact with you. Some kayak mods will be strictly regulated by state, federal, and even international law. These will be the most frustrating of the mods to set up, but they can also be the easiest to install. Consider the information presented here, and decide what you want and need for your specific kayak.
Before making any mods, make sure you’ve chosen the right kayak for your fishing adventures.
For mods you can do at home, consider these mods that will give you the electrical advantages you need for a terrific fishing quest. Check out our other articles that break down the various modification options you have. You’ll get ideas for how to accomplish some of the most must-have mods being installed today.
1. Clamp on Navigation Lights are a simple mod that don’t require drilling holes or running wires.
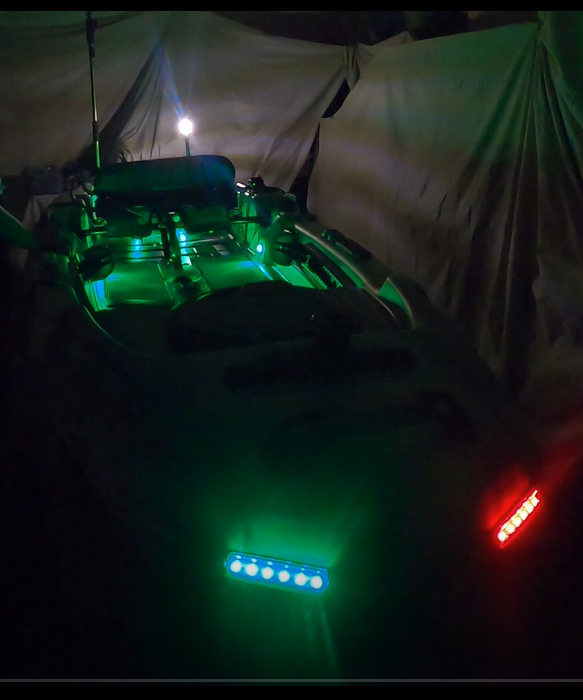
Lights are a heavily debated topic in just about every social circle you will encounter in the kayaking universe. Here in the US, the ultimate and final word in kayak and boat regulations is the USCG. So, what do they say about lights for a kayak? One, you have to have a 360-degree stern-mounted light when out on the water in the dark. Almost every kayak in the US will be required to follow this rule. Two, you may be required to have red and green bow-mounted navigation lights if your kayak uses any type of generated power (Electricity, gas, propane, etc.).
The requirements for all navigation lights aboard vessels are prescribed in Rules 20, 21, 22, and Annex I of the “Rules of the Road,” which is the Convention on the International Regulations for Preventing Collisions at Sea (72 COLREGS) or the Inland Navigation Rules (33 CFR subchapter E).
Some manufacturers are producing and distributing navigation lights that do not meet the certification requirements indicated above. These lights are typically less expensive, making them a tempting choice for uninformed consumers. Use of lights that don’t meet the regulations could result in a notice of violation or even confiscation of your boat.
The USCG suggests ensuring the following details are listed on the light or it’s packaging:
- USCG Approval 33 CFR 183.810
- MEETS ABYC A-16 or equivalent
- TESTED BY (an approved laboratory)
- Name of the light manufacturer
- Number of Model
- Visibility of the light in nautical miles
- Date on which the light was type-tested
- Identification and specification of the bulb used in the compliance test.
Options range in price from about $20 to almost $200 depending on the quality you’re willing to pay for and the features you want included. What you must watch for is compliance with the USCG requirements and the laws for the waterway you are going to be kayaking on. Remember that there can be different rules for different waterways in the same state and even in the same county.
Here in Texas, in most of the fisheries AJ and I kayak through, we are required to follow the regulations set by the USCG and TPWD. Our kayaks fall into two different categories (powerboat personal watercraft and Manually Propelled personal watercraft). No matter which kayaks we are using, we must have a 360 stern light visible for 2 nautical miles that is on whenever we are not docked and out on the water in the dark. If we are using the motorized kayaks at night, we are also required to have Red and Green navigation bow-mounted lights whenever under power…Confusing, ain’t it?
Here are the basics:
You’re using this kayak for hunting or fishing most of the time, so track down the game warden for the area you’re going to be kayaking in. We’ve talked about it before. Your local Game Warden is a fountain of knowledge and a great ally to have in your arsenal. The Game Warden will be able to explain the local regs to you and answer your specific questions.
When you’ve determined the restrictions for your fishery and decided on what you’re going to do
You can go to Walmart or your local big box sporting goods store to get a cheap setup. A better option can be to buy a higher quality and probably longer-lasting version from a kayak-related company like Railblaza or YakAttack. Your budget, your local regulations, and your personal preferences will make this decision for you.
2. Stick on lights are a bit more permanent, but still easy to install and replace as mod preferences change.
A more advanced option for lighting that gives you more versatility but also requires a bit more in the way of technical skills, is stick-on lights. These can be used for the navigation lights. They can also be used for interior lights for hull hatches and cockpit lighting.
If you opt for the more generic, universal usage, lights I strongly recommend choosing indoor/outdoor waterproof lights to preserve the longevity of your investment.
These lights are still battery-powered, so you’ll want extra batteries on hand. But they are more stationary which makes losing them significantly less likely.
In addition to the double-sided tape-style stick-on lights, there are magnetized kits now as well. Guardian Angel is one of these types of light systems.
3. Installed Navigation lights are a permanent kayak modification that provides the user with significantly more versatility and personalization when installing.
AJ and I have been using our kayaks for duck and deer hunting for several years now. We used the clamp-style lights for the first 3+ years of morning hunts. They were sufficient but frustrating. We frequently lost pieces while out in the field and had to make modifications to legally get back home. We forgot backup batteries a few times which ended up violating regulations. When the batteries get weak, the light strength gets very weak. Without full battery power, I can assure you, those cheaper lights are not visible for 2 miles.
These are some of the reasons why, AJ and I eventually opted to transition into full power systems that included installed navigation lights.
There’s a bit of stress involved. You’re going to be drilling holes into your kayak. And you’re going to have to learn a little bit about electricity. The results, however, are incredible.
If you’re interested in a plug-and-play system that takes most of the concern out of the equation for you, I recommend checking out systems like YakPower.
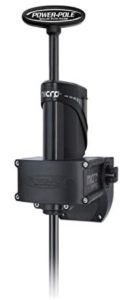
4. Power Poles only require a singple power port that can offer a variety of power supply options.
The YoloTek Boat Mount is a very simple mod to add to just about any kayak. All that is required is a 2 prong power plug. A bonus is that it’s interchangeable with the YoloTek mount or an anchor light. While the YoloTek Boat Mount is a bit on the pricey side, the versatility of the setup is great. It gives you a place for a camera if you choose to film your adventures. You’ll have a place to charge your phone or other USB-compatible electronics. There is also a place for your anchor light once it’s too dark to film anyway. One last bonus is it’s interchangeable between vessels if you fish from multiple setups.
I have been using one for the past 4 years and have recently gotten AJ into using one as well.
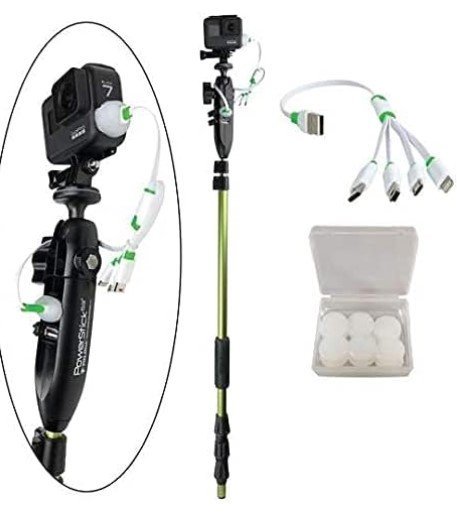
The most universal, all-inclusive mount is probably the YoloTek Power Pole which is easy to install and easily removed. YakAttack and RailBlaza have also begun producing mounting options that provide possibilities for alternative power supplies.
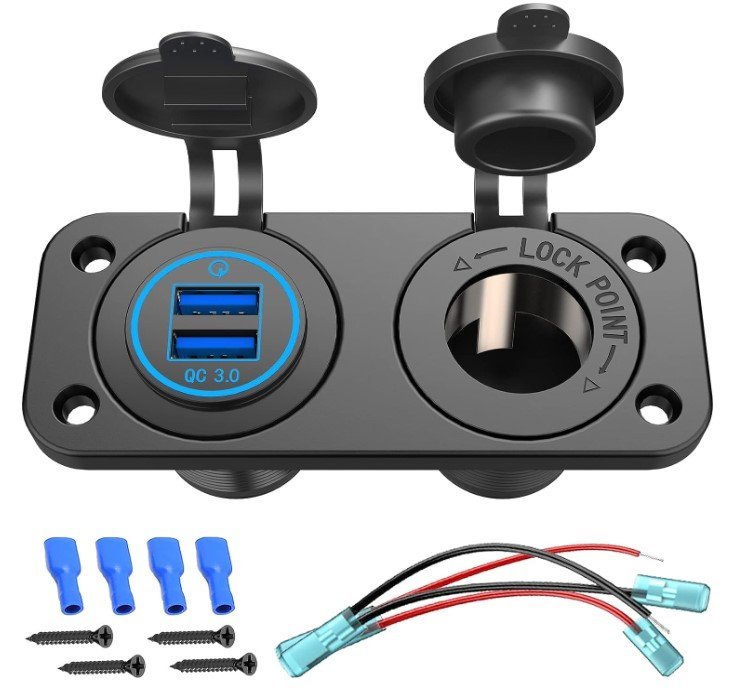
Alternatively, you can install a power port (USB, car plug, etc) and run a cord to the mounting pole of your choice.
5. Trolling motors can be the ultimate freedom for a kayak angler.
DIY recreational kayakers have a special talent for overcomplicating projects. I, for one, can vouch for this dilemma quite adamantly.
Trolling motors seem to be a particularly complicated point of contention for many of us. If you’re thinking about putting a trolling motor on your kayak you have two options.
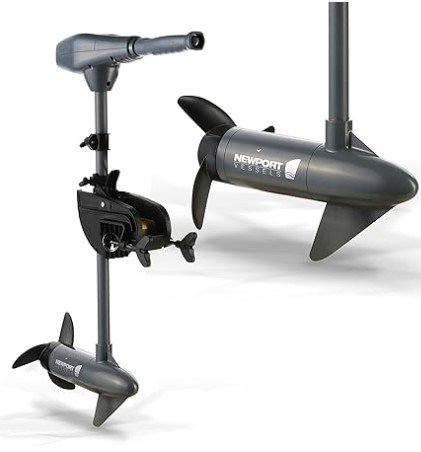
The easy route is to go to the local shop or online, look at the trolling motor options available, and purchase the one that you can afford while also providing the features you want (Foot pedal, remote control, spot lock, Stern mount).
The complicated route is to calculate weight, hull shape, and thrust distribution in connection to many trolling motors currently on the market and compare their statistics with the potential compensation many motor modifications can cause in the final output.
The physical weight of the motor increases with the number of extras the motor provides.
Remember that this weight is going to take away from the available carrying weight of your kayak’s max capacity.
The battery voltage is pretty much irrelevant in most of the circumstances new kayakers face. While a 24-volt system will give you more thrust than a 12-volt system, most kayaks are going to be lightweight enough to not experience a noticeable difference in performance. Most kayakers are investing in the 24-volt system rather than the 12-volt system to acquire bells and whistles not offered in the 12-volt systems.
When you’re ready to choose your trolling motor, the biggest question you’ll need to ask yourself is how and where will you mount the system?
Your choice of mounting location will have the most effect on how you steer.
- A Bow mounted system will require different attachments than a stern mounted system.
- A bow mount will allow you to face forward, but will typically be in the way while fishing.
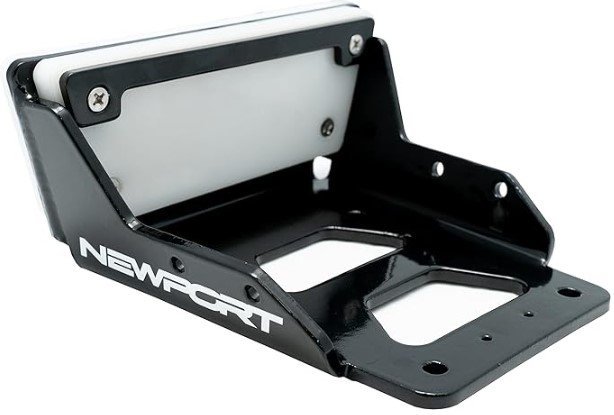
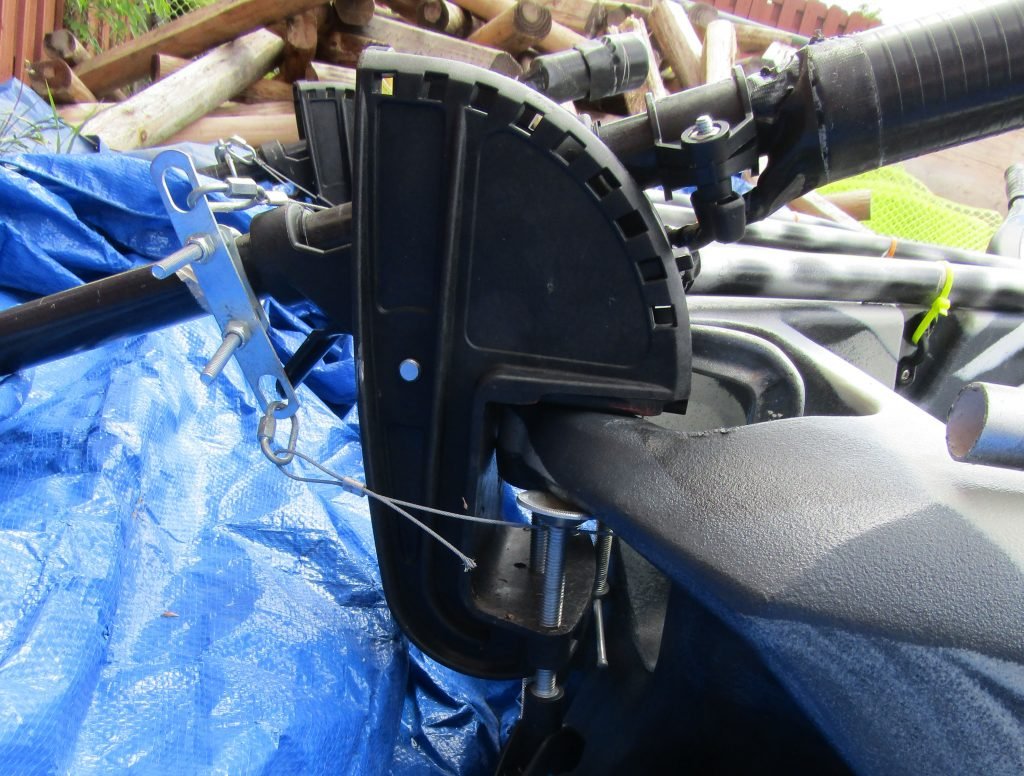
- A stern mount frequently requires you to turn sideways or backwards to steer unless you plan to build independent steering and thrust control for the most common trolling motors.
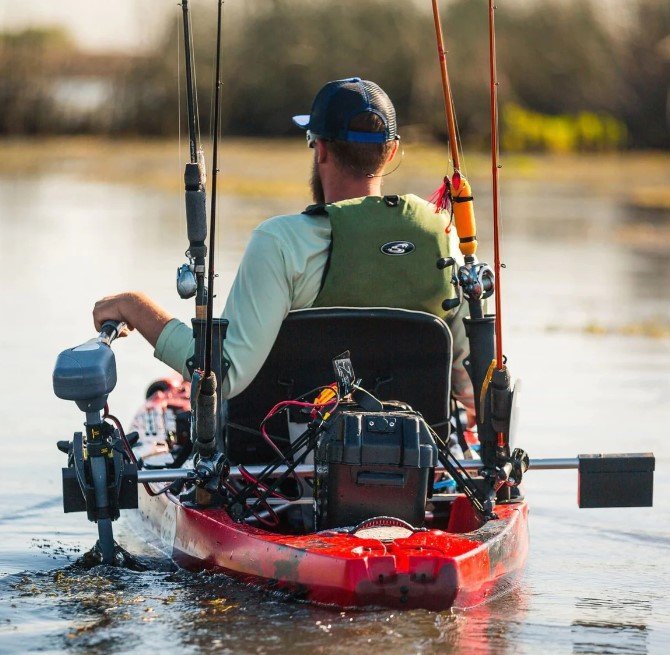
- Adaptors for a side mount will require more effort than bow or stern mounting.
- If you opt for a side mount you will have to be especially cautious of the counterbalance setup you use to prevent tipping the kayak especially when turning while in motion.
All this considered, some of the most common choices for the low end of the budget are the Newport or Minn Kota 30-40 lb trolling motors. The most popular higher-end choice that was designed specifically for kayak anglers is the Bixpy K1 or Newport NK180. Both relieve the pressures of determining placement and throttle control but can cause the need for a bit of ingenuity and mechanical insight.
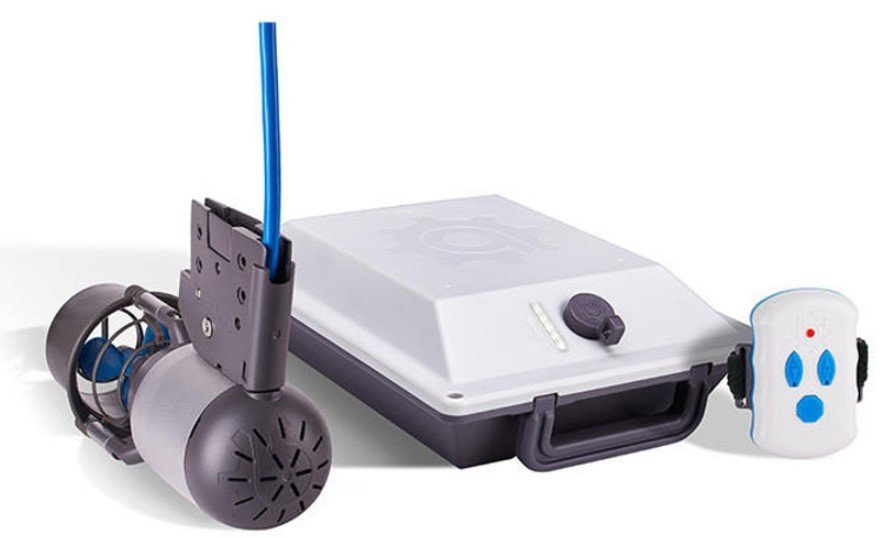

6. Fish Finders can provide a vast array of options for designed and DIY kayak mods.
Your options are almost as diverse as your kayak options. There are permanent installations, semi-permanent installations, Fully removable setups, and independent setups that have no connection to the kayak whatsoever.
Permanent installations
These will involve the attachment of transducers inside your hull or on the bottom of your hull.

Now, keep in mind, that many of the transducers are currently designed to allow you to install them inside the hull to avoid creating holes, but will have a degree of interference due to transmitting through the hull rather than having direct contact with the water.
Your solution to this issue is that most kayaks are being manufactured with a dual-purpose scupper hole that also houses your transducer casing. There are several kayaks on today’s market with replaceable mounting plates that can accommodate the permanent installation of monitor screens if you can secure your vessel where it will be protected from weather and theft.
Semi-permanent setups
With few attachments, these can allow for a transducer mount attached to something like the rutter or trolling motor and allow for the monitor to be attached to a utility track or other adjustable mounting bracket. The setup is going to be very similar to the permanent installation, but you may face a bit of interference from the trolling motor while it is running.
It’s also important to remind you here that running your trolling motor and your fish finder on the same battery can result in interference from the electrical current the trolling motor is producing.
Fully removable systems
As the least invasive, these systems can be built in a somewhat self-contained package that allows you to temporarily mount the system on your kayak for your fishing trip, and then remove the system as a single, contained, unit for transport and storage. YakAttack is one of the most popular platforms for this setup. The box holds your battery, the monitor can be attached to the top, and the transducer can be placed on an extendable arm at the side of the box.
Independent systems
Independent systems do not receive the attention or approval enjoyed by any of the above systems, but they can be an entry-level option for new kayak anglers who are trying to ease into the fish finder world slowly.
They are usually clip-on, track-mounted, or independently floating transducers that provide a variety of user options.
The floating transducers typically transmit their information to a portable remote that offers a very basic monitoring screen to the user.
You’ll know the water depth, and possibly water temperature, and have an idea of when fish are nearby. There will be little to no hope of understanding the terrain, the types of fish you’re tracking, or GPS tracking. Recently, slightly more advanced systems have been released that will allow you to see a bit more detail, but their reliability is still unproven. They do, however, allow you to learn the basics of using a fish finder at a very low entry cost.
7. Bilge Pumps are an ideal beginner modification that provide incredible safety features for any water vessel.
I really can not describe the true value of a bilge pump. Sit-inside kayaks, as we’ve discussed, are nearly impossible to empty when a new kayaker experiences an emergency. Sit-on-top kayaks run the risk of developing leaks that you will not notice until it is potentially too late.
An electric bilge pump allows you to kayak all day without taking on water blindly. The pump ejecting water will typically notify you of a problem letting you know to start making your way to shore. If you don’t notice the water, the light on your power switch will be a second warning that a problem is developing. The continuous work a bilge pump can provide affords you extra time to get to shore if you are in the middle of a large lake or a slow paddler.
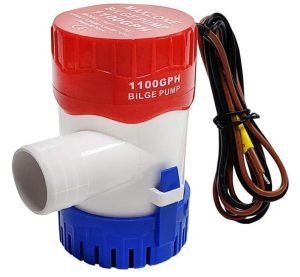
Better yet, installation and wiring are relatively simple, which can make the bilge pump a good beginner’s project.
8. Powered supply storage such as plug-in ice chests, Bait tanks, or Livewells can be as versatile and as usefull as the fish finders.
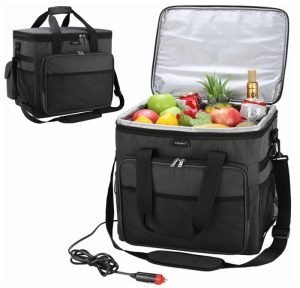
Plug-in ice chests allow you to keep your food, drinks, bait and catches cold without the added weight and cumbersome transport of ice.
Bait tanks with an aerator can keep your bait alive and fresh longer than simply keeping them in an ice chest or bucket.
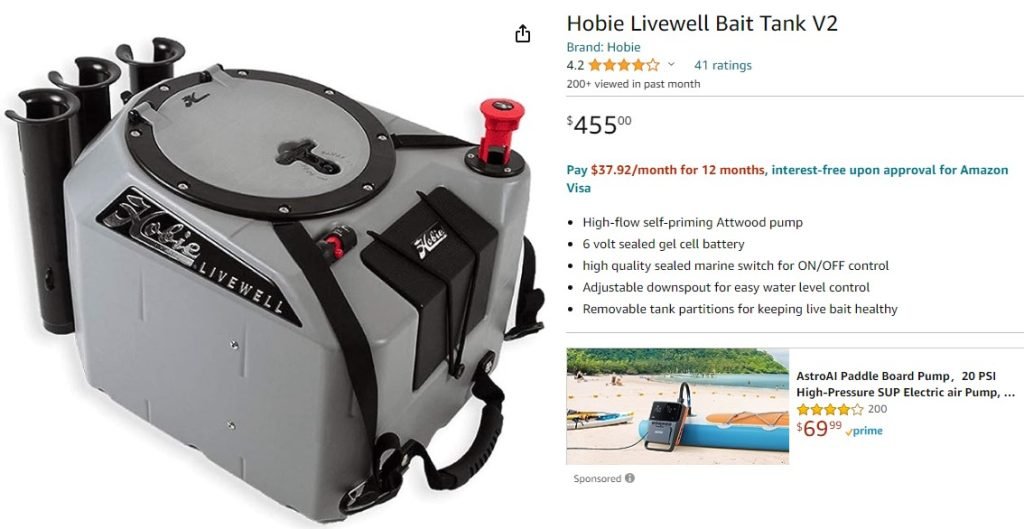
Livewells are a bit bigger, offer a few more extras (rod holders, more insulation, stronger aerators), and are a bit less portable but will allow for larger bait and longer life support.
These tend to be easy to attach to the power ports discussed earlier.
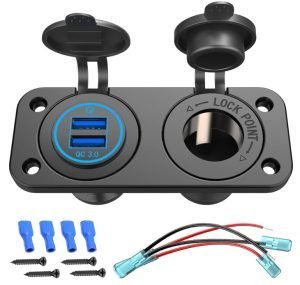
Electrifying your kayak can be as simple or as complicated as you decide.
These are just some of the options you can choose from. They are relatively easy projects that can be adopted by beginner and experienced DIYers to create a multitude of kayak modifications for your setup. The better you know your kayak, the better you’ll know what mods will be best for you. If you’re interested in more electrical modifications, check out these options for even more inspiration:
16 Great Kayak Mods Requiring Few Tools
Personalize Your Pelican Catch 100 With Full Electronics

Join The Outdoors Quest Group on Facebook and tell us about the electrical mods you’ve installed on your kayak.


